#Trick #Treat #Bags #Tutorial #FreeTutorial.net
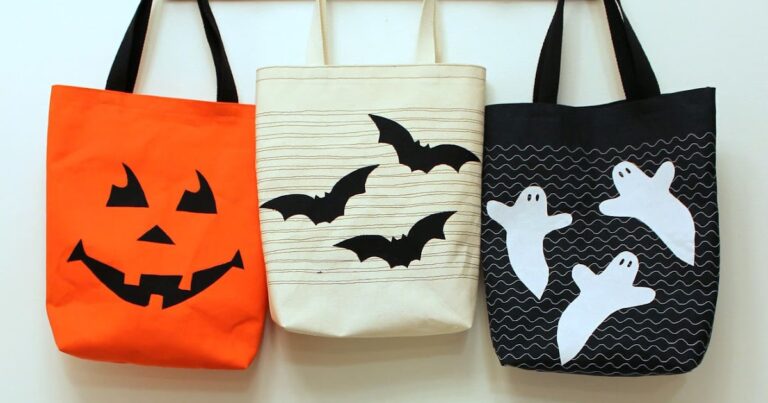
I love Halloween! These fun and simple treat bags will be a hit with your trick-or-treat-er. I like them so much, I might have to use them for my grocery shopping all through October.
For each bag, you’ll need two 15″ x 18″ pieces of cotton canvas (or duck cloth), two 22″ pieces of cotton webbing (belting), scraps of quilting cotton (see note below), and 805R Wonder Fuse. You’ll also need a heavy duty/jeans needle for your sewing machine and heavy cotton thread in the color of the canvas and also the color of your appliqued pieces. If you have a walking foot, that will make the top-stitching easier.
You can download the templates for the shapes here –> Halloween Templates. Print with no scaling. Measure the 1″ block to make sure it is the correct size.
For the ghosts, you’ll need a piece of white quilting cotton approximately 8″ x 15″, 8″ x 10″ piece of black cotton for three bats, 8″ x 10″ for “Boo!”, and 7″ x 11″ for the jack-o-lantern face. You will need enough Wonder Fuse to cover the cotton piece for whichever design you’re making.
Following the manufacturer’s instructions, fuse the exposed adhesive (not the paper covered side) to the wrong side of your cotton fabric. Allow it to cool for a few minutes.
I have found that the best way to get nice edges on your applique is to remove the paper backing and then use the template to mark your fabric and cut it out. You can mark it and cut it out before removing the paper, but I have found that to be difficult if your appliqued shape is small or detailed.
Place the applique’s (adhesive side down) onto the right side of one of your canvas pieces.
Place a damp pressing cloth over and fuse again.
Stitching the applique: There are a few different ways to quickly stitch down your appliqued shapes. You can carefully stitch around the edge (like the jack-o’lantern) or for a more fun sew a decorative topstitching design across the front piece of the bag. For the bats, I used organic lines (meaning straight, but not too straight). The ghosts and Boo bags used fun pre-programed stitches, squiggles and large zig-zags. If you use the same color thread for the topstitching as the applique, you will still be able to see the appliqued shape easily.
If you’re having trouble keeping the canvas from moving, try using a walking foot and slow down your sewing speed.
Now we assemble the bag.
With the wrong side up, press the top edge of one of the bag pieces down 1″ and press. Your piece will now measure 15″ x 16″.
Unfold and place one end of the 22″ belting onto the folded half making sure the raw edges of the belting sits almost at the fold and the outside edge of the belting is 4″ in from the side of the canvas piece. Repeat so that the other end of the canvas piece has the other end of the belting attached taking care to not twist the belting.
Secure in place by sewing back and forth on the belting only. If you stitch on the belting only, these stitches will remain hidden (so it doesn’t have to be pretty).
For the rest of the stitching, use a thread that blends with your tote. For easy reference, the photos use a contrasting black thread for clarity.
Fold the top of the bag over again (on the pre-pressed line) and fold the bag handles up (toward the top of the bag). Topstitch along the top edge at 3/4″ from the fold and at 1/8″ from the fold, securing the handle up in place as you do.
Repeat the attachment of the other handle for the other canvas piece.
Next, with right sides together, pin the two bag pieces together, matching the tops together.
Sew around the sides and bottom (leaving the top open) with a 3/8″ seam allowance.
To box the corners, pull the corner of the bag flat so that the side and bottom seams are now on top of each other. Mark a line that is 4″ across on the bag and sew on that line.
Sew a second seam just on the outside of that first seam (toward the corner of the bag) and trim the excess.
Repeat for the other corner and turn it right side out and you’re done! Happy Sewing!
Finished size of the totes is 13.5″ wide x 14″ high x 4″ deep (at the base).


