#Laundry #Bag #FreeTutorial.net
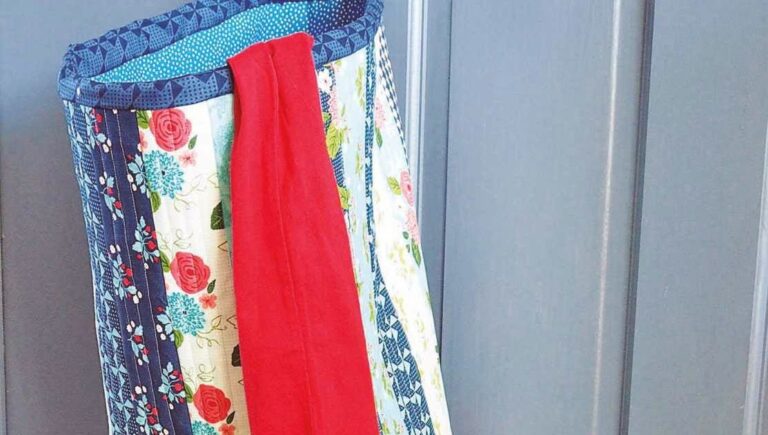
Say bye bye to washday blues and tidy away your laundry. Bedroom Laundry Bag Sewing Tutorial
FINISHED SIZE Approx 28 x 53cm (11 x 21in)
MATERIALS
11 jelly roll strips 6.5 x 112cm (2½ x 44in)
1m (1yd) base and lining fabric
1m (1yd) calico (this won’t be seen so you can use any spare fabric)
92 x 59cm (36 x 23in) wadding
50cm (½yd) 90cm wide medium weight iron-on interfacing
Threads for piecing and quilting
PREPARATION
All measurements include 1⁄4in seam allowance, unless otherwise stated.
CUTTING INSTRUCTIONS
1 Cut nine of the strips into half to make eighteen 22in strips
2 Select a strip to make a handle and cut to 18in. The remaining strip will be used for the binding.
3 From the lining and base fabric cut two 11in circles (see handy hints) and one 36 x 23in rectangle
4 From the interfacing cut one 11in circle and one 2½ x 18in strip
PREPARE THE FABRICS
1 Place an old tea towel or scrap fabric on your ironing board to protect it from any stray interfacing. Then following the manufacturers instructions press the circle of interfacing on to the reverse of one of the base circles. If necessary trim the interfacing level with the fabric.
2 Following the manufacturers instructions press the interfacing on to the wrong side of the 18in handle strip. If necessary trim the interfacing level with the fabric.
MAKING THE QUILTED PATCHWORK PANEL
1 Join eighteen of the strips lengthways. Press the seams to one side and remove any stray threads.
2 Make a quilt sandwich by placing the calico on a clean flat surface followed by the wadding and then the bag panel in the centre right side up. Pin, tack or spray baste the layers together.
3 Quilt as desired. Anita quilted in straight vertical lines approximately ½in apart. When you have finished quilting, trim any excess backing and wadding level with the patchwork.
4 With right sides together align the edge of the bottom of the bag circle with the quilted panel.
5 Leaving ½in of the panel free (for the seam allowance when stitching up the edge) slowly sew the two pieces together using a 5⁄8in seam allowance until you reach the start of the circle (Fig 1).
6 Join the two sides of the quilted panel using 1⁄4in seam allowance. It is easiest to start at the base and work up to the top. Gently finger press the seam open.
7 Turn the bag right side out.
MAKING THE HANDLE AND LINING
1 Fold the handle strip in half lengthwise, right sides together. Sew along the long side (Fig 2) and then turn so the right side is facing out. Press with the seam in the centre of the handle.
2 Take the lining panel and base and with right sides together align the edges as you did the quilted panel. Leaving ½in of the panel free (for the seam allowance when stitching up the edge)
slowly sew the two pieces together using a 5 ⁄8in seam allowance until you reach the start of the circle.
3 Join the two sides of the panel using Fig 1 Sewing the base of the bag Fig 2 Sewing the handle Fig 3 Pinning the handle in place 1⁄4in seam allowance and press the seam open.
ASSEMBLING THE BAG
1 Pin the handle right sides together, each end of the handle 1in from the seam (Fig 3).
2 Fold the binding strip in half lengthwise, wrong sides together, and press. Starting at the seam match the raw edges of the binding to the top of the bag and sew in place. Before completing your stitching, neaten the short raw edge of the starting piece and insert the ending piece into it.
3 Place the lining inside the bag, wrong sides together. Stitch around the top of the bag a scant 1⁄4in seam away from the edge to secure the lining. Take care not to catch the binding.
4 Fold the binding inside the bag over the top of the lining and neatly slipstitch in place by hand.
Handy hints
– To make an 11in diameter circle recommends using a compass or measuring kitchen plates to find one the correct size.
– Using dense quilting adds strength to the bag making it more rigid so it can stand upright.


