#Steps #Buttons #Purse #Tutorial #FreeTutorial.net
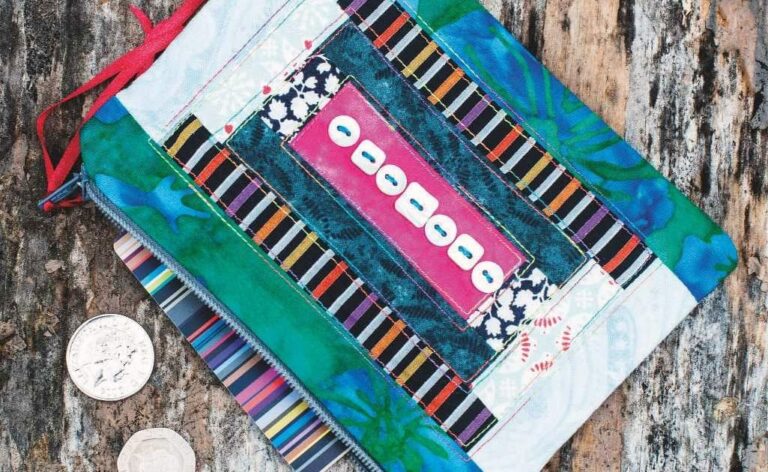
Make this attractive little purse from two Courthouse Steps blocks and an assortment of pretty buttons.
It’s always useful to keep a coin purse in the car glove box for parking change, or to store your English money when travelling abroad on holiday. The traditional Log Cabin block is a classic favourite and for this purse I used a Courthouse Steps version of the block, constructing the blocks as rectangles rather than the usual square.
Finished size
Approx 15 x 11.5cm (6 x 4 1⁄2in)
Materials
✦ Selection of fabric scraps in light and darks for the blocks, maximum size of 1⁄2 x 7in
✦ 15 x 40cm (6 x 16in) piece of calico
✦ 15 x 40cm (6 x 16in) piece of lining fabric
✦ Two scraps of fabric for zip tabs
✦ 15cm (6in) zip
✦ Machine quilting thread (used a variegated thread)
✦ Selection of pearl buttons for decoration (optional)
✦ Narrow ribbon (optional)
Preparation
All measurements include 1⁄4in seam allowances, unless otherwise stated.
MAKING A BLOCK
1. In this method, the rounds of strips are cut wider (and sometimes longer) than needed and trimmed down after sewing. Start by cutting a rectangle for the centre 1 1⁄2 x 3 1⁄4in – see Fig 1 for the block layout. For the first round of strips cut two 1 1⁄2in squares in light fabric and stitch to the short ends of the centre rectangle. Press the seams outwards. Now cut two 1 1⁄2 x 5 1⁄4in strips in dark fabric and stitch to the two longer sides of the rectangle (Fig 2). Press seams outwards. When pressing be careful not to incorporate pleats in the seams as this will distort the block. Trim the unit, measuring from the seams to cut the strips down to 3⁄4in all round (Fig 3).
2. For the second round of strips, cut two light strips 1 1⁄2 x 2
1⁄2in and two dark strips 1 1⁄2 x 5 1⁄4in. Sew these to the block, as
before (see the numbered order on Fig 1). Trim the strips down to 3⁄4in wide, again, measuring from the seams (Fig 4).
3.
For the third round, cut the light strips 1 1⁄2 x 3 1⁄2in and the dark
strips 1 1⁄2 x 7in and add these to the block as before. This time trim
the strips so they are 1 1⁄8in wide, measuring from the seams (Fig 5). The block should measure 7 x 5 1⁄4in at this stage.
4. Repeat this whole process to make a second block for the back of the purse. When cutting the fi nal round of the second block down to size, make sure it is exactly the same size as the fi rst block.
QUILTING
1. Place a block wrong sides together on top of a piece of the calico cut slightly larger than the block. Press the two layers together. Use a decorative machine quilting thread and quilt close to the seams all around the outside edge, to within about 1⁄4in of the seam allowance (Fig 6). When quilting is finished, trim the calico down to the same size as the block (Fig 7).
Repeat this with the other block.
INSERTING THE ZIP
1. For the zip tabs, cut two 2 1⁄2 x 1 1⁄4in
pieces of fabric, fold in half length ways and place the fold onto the
right side of each end of the zip. Stitch across the folded edge of the
tab onto the zip. Trim the raw edges of the tab with the zip end and the
sides of the tab level with the long edges of the zip (Fig 8).
2.
Cut two pieces of lining fabric exactly the same size as the patchwork
panels. Place a lining piece right side up, then place the tabbed zip
right side up along the raw edge of the lining, then a patchwork panel,
right side down. Match up all the edges and pin. Tack the layers
together at the long top edge, trapping the zip between the lining and
patchwork panel. Using a zipper foot, stitch the three layers together
close to the teeth and press open (Fig 9). Repeat for the other side, with the other block and another piece of lining fabric (Fig 10).
3.
Open the zip and position the fabric layers with the lining pieces and
the patchwork panels right sides together. Match up the edges all
round. The zip will lie towards the lining (Fig 11). Stitch all
round the outside edges, leaving a gap in the bottom of the lining. Clip
the corners of the seams (Fig 12). Turn through the gap in the lining
and the opened zip and push out the corners. Close the gap in the lining
with slipstitch and then push the lining into the purse.
4 . To
decorate if desired, stitch a row of pearl buttons on each side along
the centre rectangle of each block. Thread narrow ribbons through the
hole in the zip slider to finish.


